You’ve purchased one of our plugins and still see the watermark on your footage? Let’s fix that!
In some cases, especially with Final Cut Pro, when you enter your serial number the demo watermark doesn’t disappear. This is almost always caused by the host app caching the render with the watermark. Sometimes the host app doesn’t recognize you entering your serial number as something that would affect the render. So… it doesn’t re-render anything… and you have a licensed plugin and you still see the watermark.
This is most common in Final Cut Pro. In fact, it almost always happens. So we’ll tackle FCP first.
Final Cut Pro
In FCP, as mentioned, if the demo watermark lines are still there after activating the plug-in, it’s due to a cached render. The easiest way to fix this is to change any parameter. For example, in Flicker Free change Threshold from 20 to 19. FCP knows you made a change and will re-render the screen without the watermark. Usually, a small change like this won’t affect the look of the plugin. (For Flicker Free use Threshold, for Beauty Box use Skin Smoothing, etc)
You can also clear this by selecting your project in the Browser window in FCP, then go to File > Delete Generated Project files, check “Delete Render Files”, and click OK. This will remove the watermark from every frame in that project. The downside is that it clears _all_ the cached files including ones not affected by the watermark. This isn’t a problem, but it may slow FCP down for a few minutes while it re-renders everything.
Premiere
In Premiere, if you still see the watermark after entering the serial number, first click on a different frame on the timeline. Registering the plug-in doesn’t always cause the video preview to update, so moving the playhead after registering will cause the watermark to disappear.
If that doesn’t do it, you can delete the render files for that sequence by clicking the Sequence menu at the top of Premiere, selecting Delete Render Files, and clicking OK.
After Effects
After Effects does re-load the current frame after entering the serial number, so it should do a good job removing the watermark without you having to do anything else. You can delete the cached preview if necessary by clicking Edit at the top of After Effects and selecting Purge > Image Cache Memory.
Resolve
Resolve gives you a few options when deleting the render files. Click Playback at the top of Resolve, select Delete Render Cache, and then choose All to delete all of the render files for that project, or choose Selected Clips to delete the render files for the clips you have selected on the timeline (make sure to actually select the clips before doing this). Either way will delete any remaining watermarked frames.
All host apps: Make sure the plug-in is registered
If you see the watermark lines, it’s possible the plug-in is not actually registered on that computer, or that the license was deactivated so it could be used on a different computer if you’re using it on more than one. If you’re upgrading to a new release (Beauty Box 4 to Beauty Box 5 or FLicker Free 1 to FLicker Free 2, you’ll be asked to enter your new serial number for that version.
Check the registration status by clicking the Register or Setup button in the plug-in controls, in the location below:
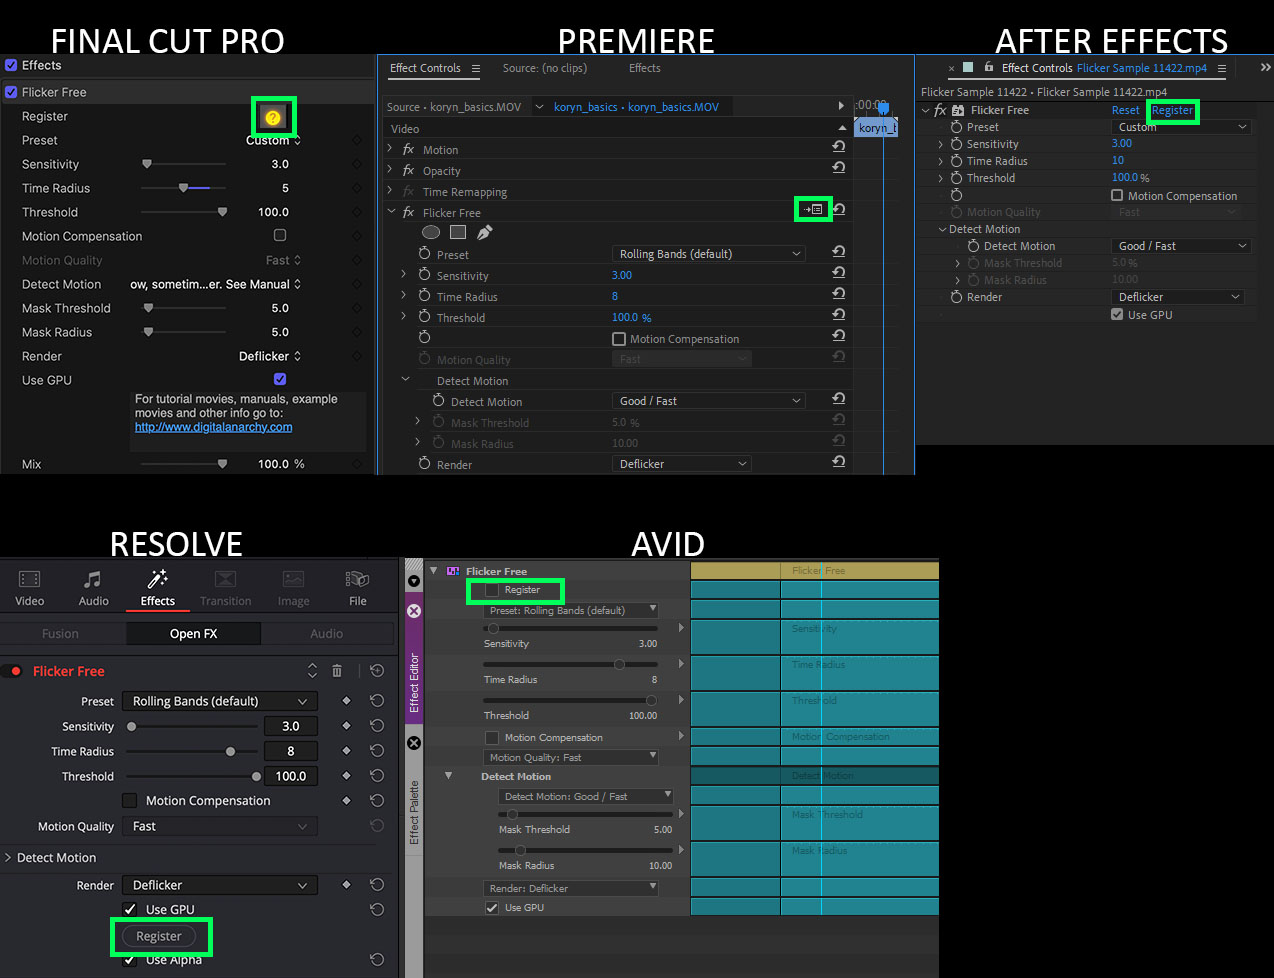
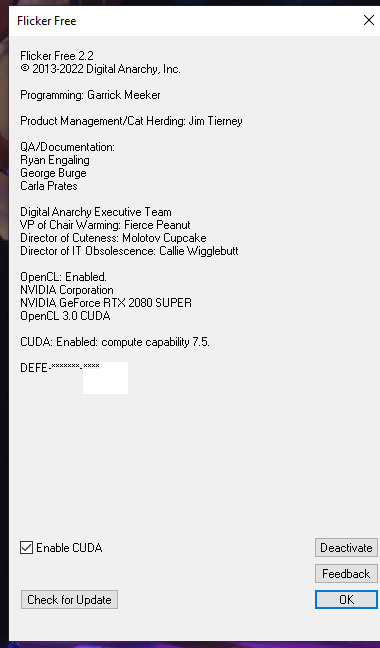
If the plug-in is registered, you’ll see the registration info window. This means the plug-in is registered:
If it isn’t registered, you can click Authorize and then enter your Name (you can enter anything), Organization (you can enter anything or leave this blank), and serial number.
If you have any questions or are running into any issues activating a plug-in after following these steps, send us an email at cs@nulldigitalanarchy.com