Category Archives: Premiere Pro

Transcriptive as a collaboration tool for remote worflows

This past two weeks Social Media channels have been flooded with video production crews sharing their remote editing stations and workflows. As everybody struggles to adapt and stay productive we’re hoping the Transcriptive web app, which has a new beta version, can help you with some of your challenges.

New Transcriptive.com Beta Version

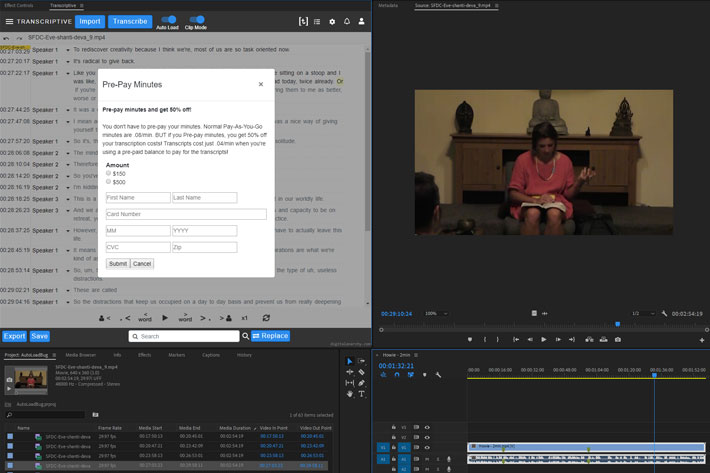
We just updated https://app.transcriptive.com with a new version. It’s still in beta, so it’s still free to use. It’s a pretty huge upgrade from the previous beta. With a new text editor and sharing capabilities. Users can also upload a media file, transcribe, manage speakers, edit, search and export transcripts without having to access Premiere Pro.

But the real strength is the ability to collaborate and share transcripts with Premiere users and other web users.

How’s Transcriptive going to help keep everyone in sync when they’re working remotely?

The web app was designed from the beginning to help editors work remotely with clients or producers. Transcripts can be easily edited and shared between Premiere Pro and a web browser or between two web users. 

This means  producers, clients, assistant editors, and interns can easily review and clean up transcripts on the web and send them to the Premiere editor. They can also identify the timecode of video segments that are important or have problems. All this can be done in a web browser and then shared.

If you are a video editor and have been transcribing in Premiere Pro, sending the transcripts and media to Transcriptive.com is quick and makes it easy for team members to access the footage and the transcribed text.

Premiere To A Web Browser

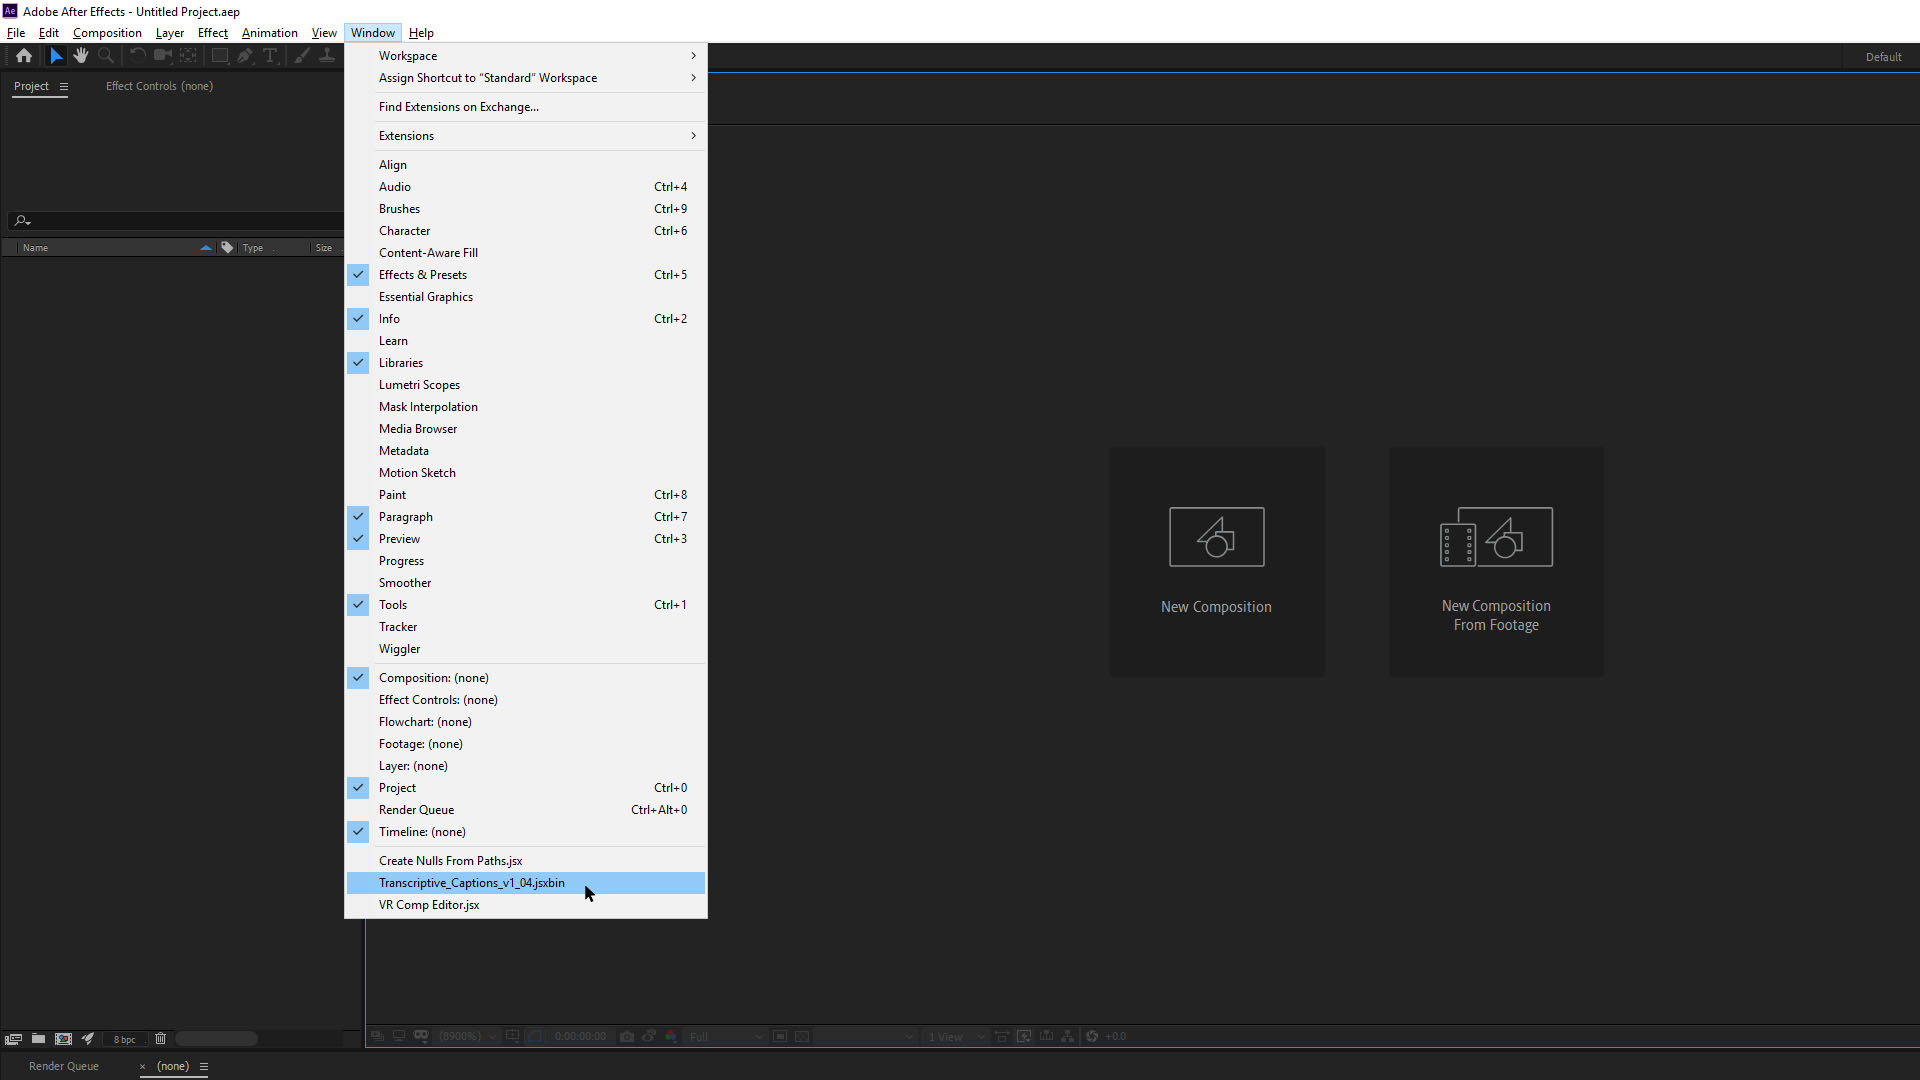
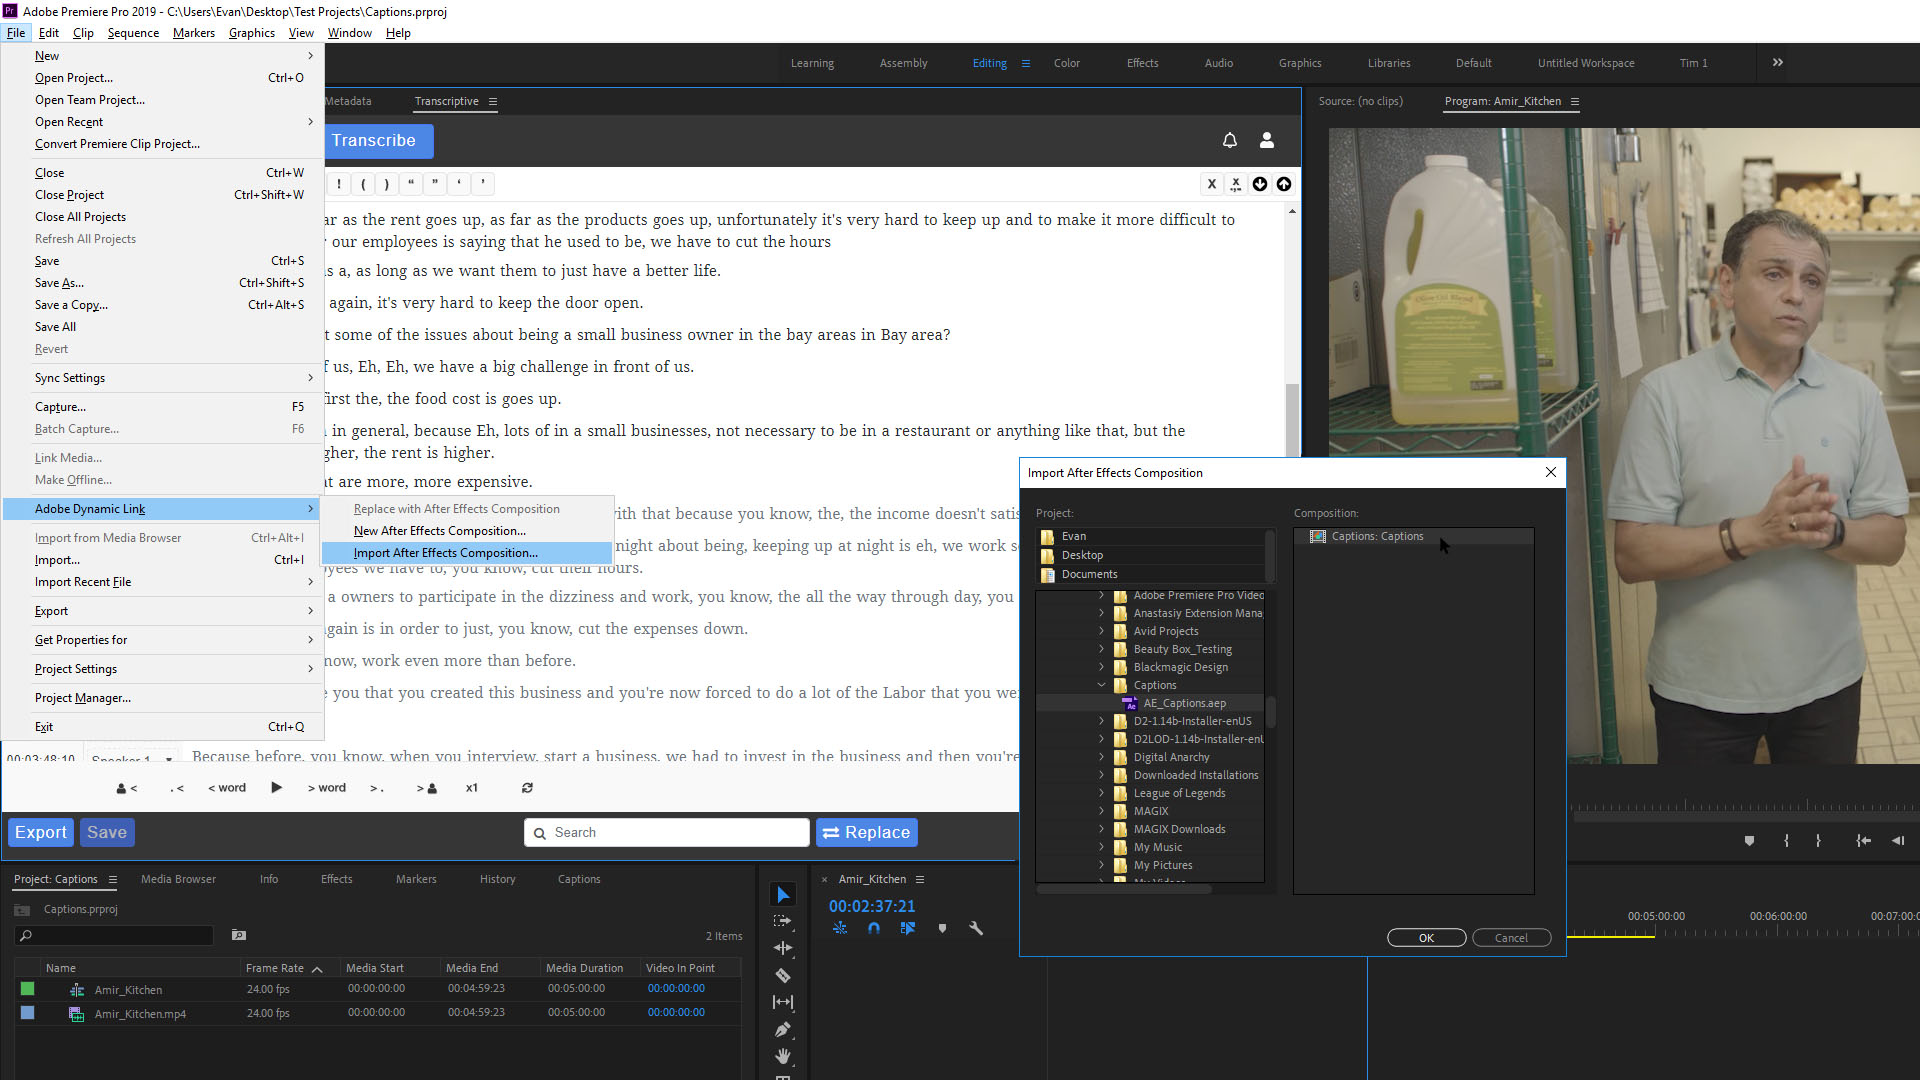
Click on the [ t ] menu in Premiere Pro, link to a web project, and then you can upload the transcript, video, or both. Team members can then log into the Transcriptive.com account and view it all! 

TMenu

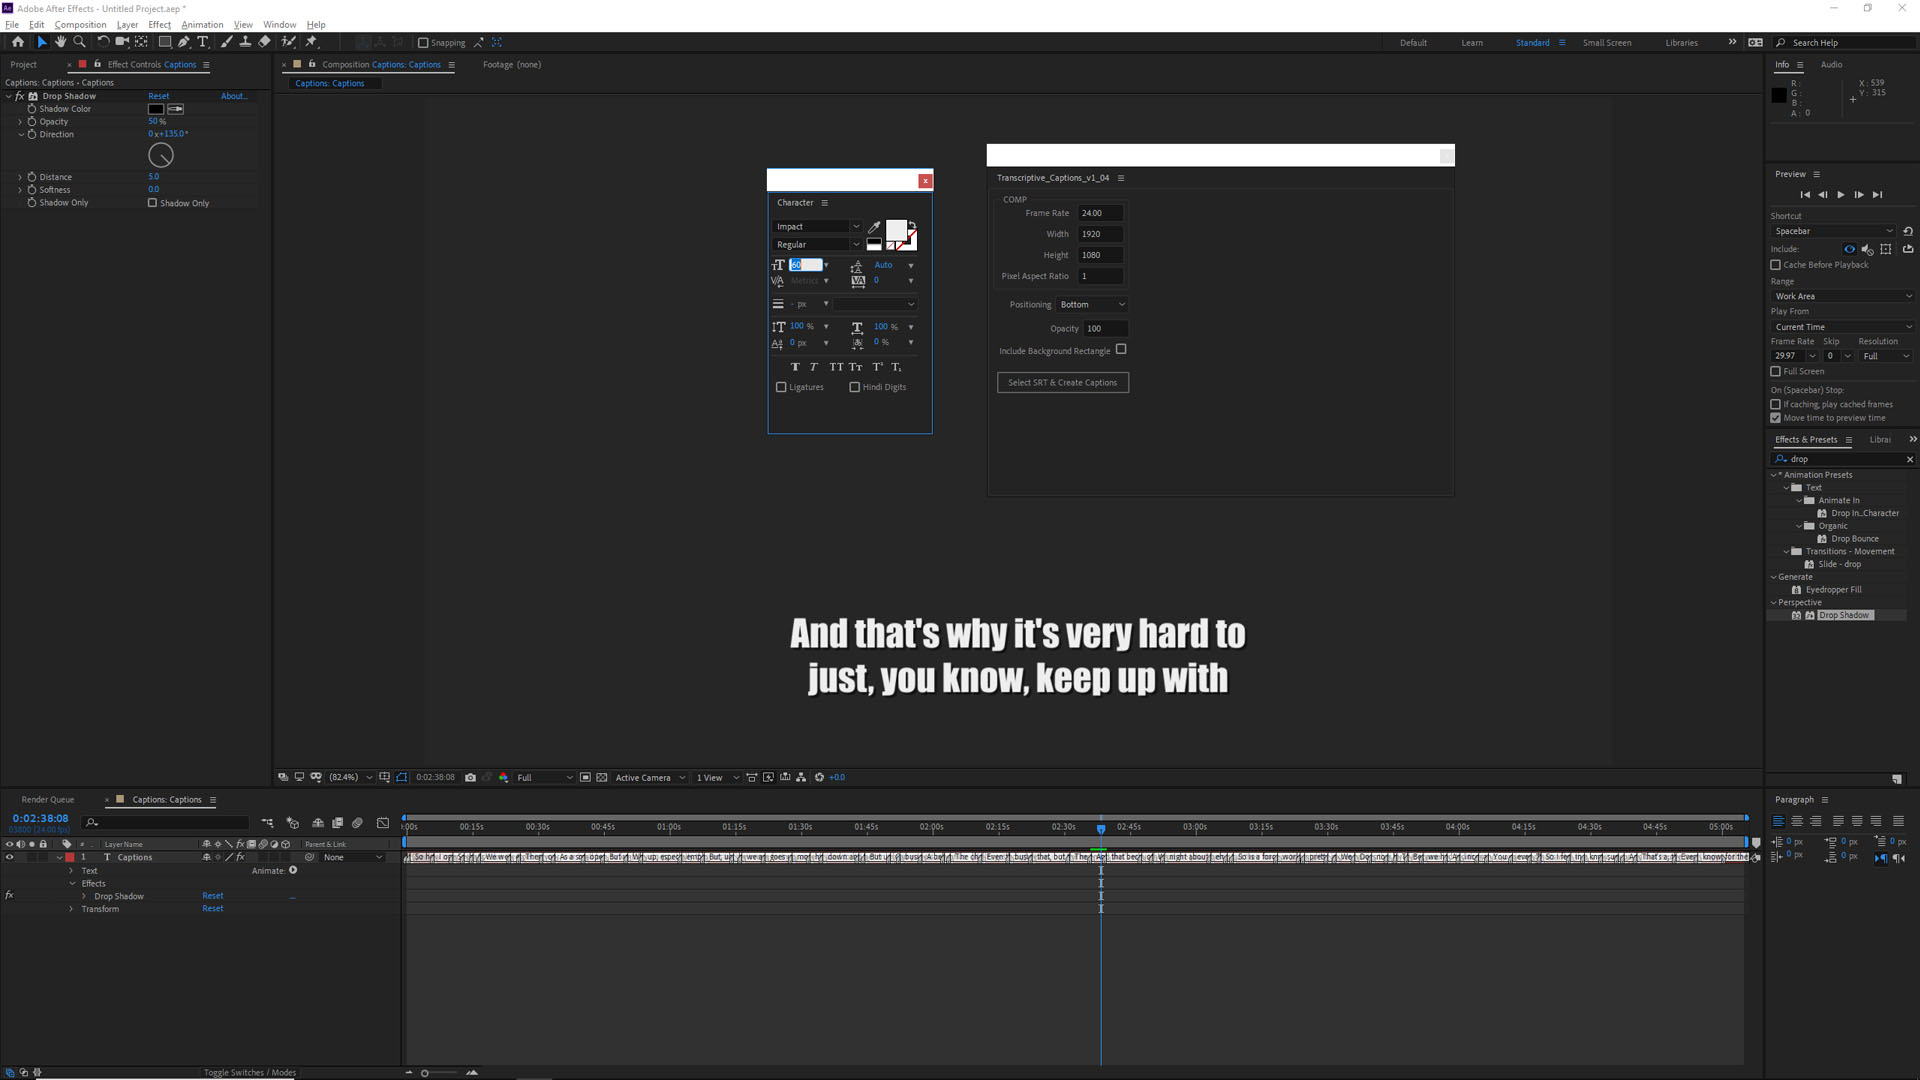
Web users are able to edit the transcripts, watch the uploaded clips, see the timecode on the transcript, export the transcript as a Word Document, plain text, captions, and subtitle files, etc.  Other features like adding comments or highlighting text are coming soon.

From The Web To Premiere

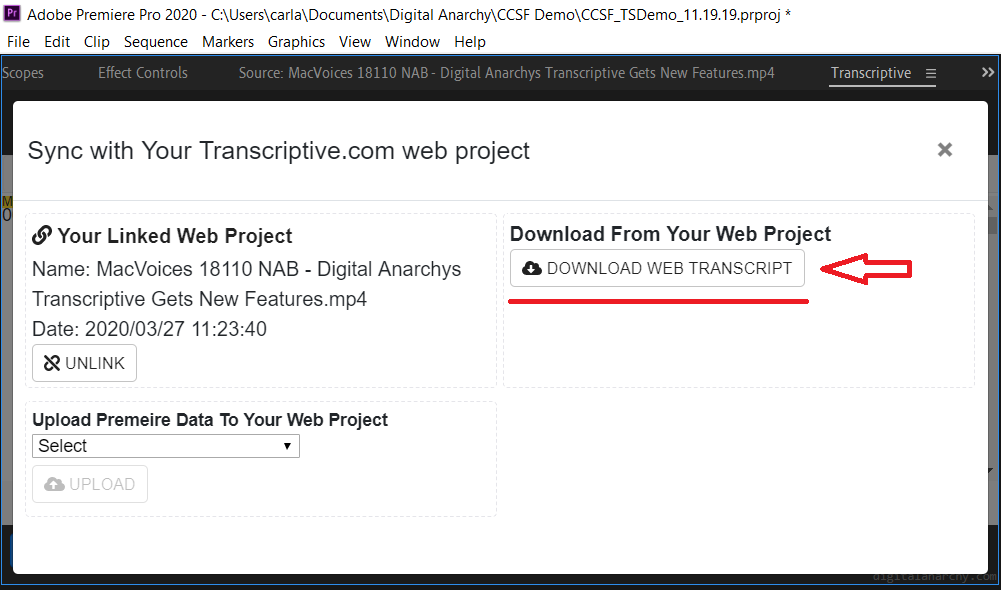
Once web user is done editing or reviewing the transcript, the editor can pull it back into Premiere. Again, go to the [ t ] menu, and select ‘Download From Your Web Project’. This will download the transcript from Transcriptive.com and load it for the linked video.

DownloadTranscript
Web users can also transcribe videos they upload and share them with other web users. The transcripts can then be downloaded by an editor working in Premiere. Usually it’s a bit easier to start the video upload process from Premiere, but it is possible to do everything from Transcriptive.com.

It’s a powerful way of collaborating with remote users, letting you share videos, transcripts and timecode. Round tripping from Premiere to the web and back again, quickly and easily. Exactly what you need for keeping projects going right now.

Curious to try our BETA web App but still have questions on how it works? Send an email to carla@nulldigitalanarchy.com. And if you have tried the App we would love to hear your feedback!

Use Transcriptive to transcribe in Premiere for only $2.40/hr (.04/min)

A lot of you have a ton of footage that you want to transcribe. One of our goals with Transcriptive has been to enable you to transcribe everything that goes into your Premiere project. To search it, to create captions, to easily see what talent is saying, etc. But if you’ve got 100 hours of footage, even at $0.12/min the costs can add up. So…

Transcriptive has a new feature that will help you cut your transcribing costs by 50%. The latest version of our Premiere Pro transcription plugin has already cut the costs of transcribing from $0.012 to $0.08. However, our new prepaid minutes’ packages goes even further… allowing users to purchase transcribing credits in bulk! You can save 50% per minute, transcribing for $2.40/hr or .04/min. This applies to both Transcriptive AI or Speechmatics. 

download

The pre-paid minutes option will reduce transcription costs to $0.04/min which can be purchased in volume for $150 or $500. For small companies and independent editors, the $150 package will make it possible to secure 62.5 hours of transcription without breaking the bank. If you and your team are transcribing large amounts of footage, going for the $500 will allow you to save even more. 

The credits are good for 24 months, so you don’t need to worry about them expiring. 

You don’t HAVE to pre-pay. You can still Pay-As-You-Go for $0.08/min. That’s still really inexpensive for transcription and if you’re happy with that, we’re happy with it too.

However, if you’re transcribing a lot of footage, pre-paying is a great way of getting costs down. It also has other benefits, you don’t need to share your credit card with co-workers and other team members. For bigger companies, production managers, directors or even an account department can be in charge of purchasing the minutes and feeding credits into the Premiere Pro Transcriptive panel so editors no longer have to worry about the charges submitted to the account holder’s credit card. 

prepay-tsonly

Buying the minutes in advance is simple!  Go to your Premiere Pro panel, click on your profile icon, choose “Pre-Pay Minutes” and select the option that better suits your needs. You can also pre-pay credits from your web app account by logging into  app.transcriptive.com, opening your “Dashboard” and clicking on “Buy Minutes”. A pop-up window will ask you to choose the pre-paid minutes package and ask for the credit card information. Confirm the purchase and your prepaid minutes will show under “Balance” on your homepage. The prepaid minutes’ balance will also be visible in your Premiere Pro panel, right next to the cost of the transcription. 

Applying purchased credits to your transcription jobs is also a quick and easy process. While submitting a clip or sequence for transcription, Transcriptive will automatically deduct the amount required to transcribe the job from your balance. If the available credit is not enough to transcribe your job, the remaining minutes will be charged to the credit card on file.

The 50% discount on prepaid minutes will only apply to transcribing, but minutes can be used to Align existing transcripts at regular cost. English transcripts can be imported into Transcriptive and aligned to your clips or sequences for free, while text in other languages will align for $0.02/min with Transcriptive AI and $0.04/min with Transcriptive Speechmatics.  

Would you like to try Transcriptive for yourself? Download a free demo at https://digitalanarchy.com/transcribe-video/transcriptive-trial.html or email sales@nulldigitalanarchy.com.

How transcripts can help you to increase the reach of your Social Media videos

Video editing workstation with video camera beside monitor


Have you ever considered using Transcriptive to build an effective Search Engine Optimization (SEO) strategy and increase the reach of your Social Media videos? Having your footage transcribed right after the shooting can help you quickly scan everything for soundbites that will work for instant social media posts. You can find the terms your audience searches for the most, identify high ranked keywords in your footage, and shape the content of your video based on your audience’s behavior. 

According to vlogger and Social Media influencer Jack Blake, being aware of what your audience is doing online is a powerful tool to choose when and where to post your content, but also to decide what exactly to include in your Social Media Videos,  which tend to be short and  soundbite-like. The content of your media, titles, video descriptions and thumbnails, tags and post mentions should all be part of a strategy built based on what your audience is searching for. And this is why Blake is using Transcriptive not only to save time on editing but also to carefully curate his video content and attract new viewers.

Right after shooting his videos, the vlogger transcribes everything and exports the transcripts as rich text so he can quickly share the content with his team. After that, a Copywriter scans through the transcribed audio and identifies content that will bring traffic to the client’s website and increase ROI. “It’s amazing. I transcribe the audio in minutes, edit some small mistakes without having to leave Premiere Pro, and share the content with my team. After that, we can compare the content with our targeted keywords and choose what I should cut. The editing goes quickly and smoothly because the words are already time-stamped and my captions take no time to create. I just export the transcripts as an SRT and it is pretty much done, explains Blake.

Of course, it all starts with targeting the right keywords and that can be tricky, but there are many analytics and measurement applications offering this service nowadays. If you are just getting started in the whole keyword targeting game, the easiest and most accessible way is connecting your  In-site Search queries with Google Analytics. This will allow you to get information on how users are interacting with your website, including how much your audience searches, who is performing searches and who is not, and where they begin searching, as well where they head to afterward. Google Analytics will also allow you to find out what exactly people are typing into Google when searching for content on the web. 

For Blake, using competitors’ hashtags from Youtube has been very helpful to increase video views. “One of the differentials in my work is that I research my client’s competitors on Youtube and identify the VidIQs (Youtube keyword tags) they have been using on their videos so we can use competitive tagging in our content description and video title. This allows the content I produced for the client to show when people search for this specific hashtag on Youtube,” he explains. Blake’s team is also using Google Trends, a website that analyzes the popularity of top search queries in Google Search across various regions and languages. It’s a great tool to find out how often a search term is entered in Google’s search engine, compare it to their total search volume, and learn how search trends varied within a certain interval of time.

When asked what would be the last thing he would recommend to video makers wanting to boost their video views on Social Media, Blake had no hesitation in choosing captions. Social media feeds are often very crowded, fast-moving, and competitive. Nobody has time to open the video as full screen, turn the sound on and watch the whole thing, they often watch the videos without sound, and if the captions are not there then your message will not get through. And Transcriptive makes captioning a very easy process,” he says. 

Sometimes we just need to fix flicker it in post. And that’s ok!

image_FF_BlogPost

It’s been 5 years since we released Flicker Free, and we can for sure say flickering from artificial lights is still one of the main reasons creatives download our flicker removal plugin. From music videos and reality-based videos to episodics on major networks, small productions to feature-long films, we’ve seen strobing caused by LED and fluorescent lights. It happens all the time and we are glad our team could help fix flickering and see those productions look their best as they get distributed to the public.  

Planning a shoot so you can have control of your camera settings, light setup and color balance is still definitely the best way to film no matter what type of videos you are making. However, flickering is a difficult problem to predict and sometimes we just can’t see it happening on set. Maybe it was a light way in the background or an old fluorescent that seemed fine on the small on-set monitor but looked horrible on the 27″ monitor in the edit bay. 

Of course, in a perfect world we would take our time to shoot a few minutes of  test footage, use a full size monitor to check what the footage looks like, match the frame rate of the artificial light to the frame rate of the camera and make sure the shutter speed is a multiple/division of the AC frequency of the country we are shooting in. Making absolutely sure the image looks sharp and is free of flicker! But we all know this is often not possible. In these situations, post-production tools can save the day and there’s nothing wrong about that!

Travel videos are the perfect example of how sometimes we need to surrender to post-production plugins to have a high-quality finished video. Recently, Handcraft Creative co-owner Raymond Friesen shot beautiful images from pyramids in Egypt. He was fascinated by the scenery but only had a Sony A73 and a 16-70mm lens with him. After working on set for 5 years, with very well planned shoots, he knew the images wouldn’t be perfect but decided to film anyways. Yes, the end result was lots of flicker from older LED lights in the tombs. Nothing that Flicker Free couldn’t fix in post. Here’s a before and after clip:

Spontaneous filmmaking is certainly more likely to need post-production retouches, but we’ve also seen many examples of scripted projects that need to be rescued by Flicker Free. Filmmaker Emmanuel Tenenbaum talked to us about two instances where his large experience with short films was not able to stop LED flicker from showing up on his footage. He purchased the plugin a few years ago for “I’m happy to see you”, and used it again to be able to finish and distribute Two Dollars (Deux Dollars), a comedy selected in 85 festivals around the world, winner of 8 awards, broadcasted on a dozen TV channels worldwide and chosen  as Vimeo Staff Pick Premiere of the week. Curious why he got flicker while filming Two Dollars (Deux Dollars)? Tenenbaum talked to us about tight deadlines and production challenges in this user story!

Those are just a few examples of how artificial lights flickering couldn’t be avoided. Our tech support team often receives footage from music video clips, marketing commercials, and sports footage, and seeing Flicker Free remove very annoying, sometimes difficult, flicker in the post has been awesome. We posted some other user story examples on our website so check them out! And If you have some awful flickering footage that Flicker Free helped fix we’d love to see it and give you a shout out on our Social Media channels. Email press@nulldigitalanarchy.com with a link to your video clip! 


Using After Effects to create burned-in subtitles from SRTs

Recently, an increasing number of Transcriptive users have been requesting a way of using After Effects to create burned-in subtitles using SRTs from Transcriptive. This made us anarchists get excited about making a  Free After Effects SRT Importer for Subtitling And Captions.

Captioning videos is more important now than ever before. With the growth of mobile and Social Media streaming, YouTube and Facebook videos are often watched without sound and subtitles are essential to retain your audience and make them watchable. In addition to that, the Federal Communications Commission (FCC) has implemented rules for online video that require subtitles so people with disabilities can fully access media content and actively participate in the lives of their communities. 

As a consequence, a lot of companies have style guides for their burned-in subtitles and/or want to do something more creative with the subtitles than what you get with standard 608/708 captions. I mean, how boring is white, monospaced text on a black background? After Effects users can do better.

While Premiere Pro does allow some customization of subtitles, creators can get greater customization via After Effects. Many companies have style guides or other requirements that specify how their subtitles should look. After Effects can be an easier place to create these types of graphics. However, it doesn’t import SRT files natively so the SRT Importer will be very useful if you don’t like Premiere’s Caption Panel or need subtitles that are more ‘designed’ than what you can get with normal captions. The script makes it easy to customize subtitles and bring them into Premiere Pro. Here’s how it works:

  1. Go to the registration page our registration page.
  1. Download the .jsxbin file. 
  1. Put it here: 
  • Windows: C:\Program Files\Adobe\Adobe After Effects CC 2019\Support Files\Scripts\ScriptUI Panels
  • Mac:  Applications\Adobe After Effects CC 2019\Scripts\ScriptUI Panels

3. folder location

4. Restart AE. It’ll show up in After Effects under the Window\Transcriptive_Caption

3.select panel

5. Create a new AE project with nothing in it. Open the panel and set the parameters to match your footage (frame rate, resolution, etc). When you click Apply, it’ll ask for an SRT file. It’ll then create a Comp with the captions in it.

5. import SRT

  1. Select the text layer and open the Character panel to set the font, font size, etc. Feel free to add a drop shadow, bug or other graphics.

6.character style

7. Save that project and import the Comp into Premiere (Import the AE project and select the Comp). If you have a bunch of videos, you can run the script on each SRT file you have and you’ll end up with an AE project with a bunch of comps named to match the SRTs (currently it only supports SRT). Each comp will be named: ‘Captions: MySRT File’. Import all those comps into Premiere.

7. import comp

8. Drop each imported comp into the respective Premiere sequence. Double-check the captions line up with the audio (same as you would for importing an SRT into Premiere). Queue the different sequences up in AME and render away once they’re all queued up. (and keep in mind it’s beta and doesn’t create the black backgrounds yet).

Although especially beneficial to Transcriptive users, this free After Effects SRT Importer for Subtitling And Captions will work with any SRT from any program and it’s definitely easier than all the steps above make it sound and it is available for all and sundry on our website. Give it a try and let us know what you think! Contact: sales@nulldigitalanarchy.com

Easy Ways of Animating Masks for Use with Beauty Box in After Effects, Premiere, and Final Cut Pro

Like Digital Anarchy On Facebook


We have a new set of tutorials up that will show you how to easily create masks and animate them for Beauty Box. This is extremely useful if you want to limit the skin retouching to just certain areas like the cheeks or forehead.

Traditionally this type of work has been the province of feature films and other big budget productions that had the money and time to hire rotoscopers to create masks frame by frame. New tools built into After Effects and Premiere Pro or available from third parties for FCP make this technique accessible to video editors and compositors on a much more modest budget or time constraints.

Using Masks that track the video to animate them with Beauty Box for more precise retouching

How Does Retouching Work Traditionally?

In the past someone would have to create a mask on Frame 1 and  move forward frame by frame, adjusting the mask on EVERY frame as the actor moved. This was a laborious and time consuming way of retouching video/film. The idea for Beauty Box came from watching a visual effects artist explain his process for retouching a music video of a high profile band of 40-somethings. Frame by frame by tedious frame. I thought there had to be an easier way and a few years later we released Beauty Box.

However, Beauty Box affects the entire image by default. The mask it creates affects all skin areas. This works very well for many uses but if you wanted more subtle retouching… you still had to go frame by frame.

The New Tools!

After Effects and Premiere have some amazing new tools for tracking mask points. You can apply bezier masks that only masks the effect of a plugin, like Beauty Box. The bezier points are ‘tracking’ points. Meaning that as the actor moves, the points move with him. It usually works very well, especially for talking head type footage where the talent isn’t moving around a lot. It’s a really impressive feature. It’s  available in both AE and Premiere Pro. Here’s a tutorial detailing how it works in Premiere:

After Effects also ships with Mocha Pro, another great tool for doing this type of work. This tutorial shows how to use Mocha and After Effects to control Beauty Box and get some, uh, ‘creative’ skin retouching effects!

The power of Mocha is also available for Final Cut Pro X as well. It’s available as a plugin from CoreMelt and they were kind enough to do a tutorial explaining how Splice X works with Beauty Box within FCP. It’s another very cool plugin, here’s the tutorial:

Creative Cloud 2015 and After Effects, Premiere Pro Plug-ins

All of our current plugins have been updated to work with After Effects and Premiere Pro in Creative Cloud 2015. That means Beauty Box Video 4.0.1 and Flicker Free 1.1 are up to date and should work no problem.

Flicker Free 1.1 is a free update which you can download here: http://digitalanarchy.com/demos/main.html

What if I have an older plugin like Beauty Box 3.0.9? Do I have to pay for the upgrade?

Yes, you probably need to upgrade and it is a paid upgrade. After Effects changed the way it renders and Premiere Pro changed how they handle GPU plugins (of which Beauty Box is one). The key word here is probably. Our experience so far has been mixed. Sometimes the plugins work, sometimes not.

Premiere Pro: Beauty Box 3.0.9 seems to have trouble in Premiere if it’s using the GPU. If you turn ‘UseGPU’ off (at the bottom of the BB parameter list), it seems to work fine, albeit much slower. Premiere Pro did not implement the same re-design that After Effects did, but they did add an API specifically for GPU plugins. So if the plugin doesn’t use the GPU, it should work fine in Premiere. If it uses the GPU, maybe it works, maybe not. Beauty Box seems to not.

After Effects: Legacy plugins _should_ work but slow AE down somewhat. In the case of Beauty Box, it seems to work ok but we have seen some problems. So the bottom line is: try it out in CC 2015, if it works fine, you’re good to go. If not, you need to upgrade. We are not officially supporting 3.0.9 in Creative Cloud 2015.

– The upgrade from 3.0 is $69 and can be purchased HERE.

– The upgrade from 1.0/2.0 is $99 and can be purchased HERE.


The bottom line is try out the older plugins in CC 2015. It’s not a given that they won’t work, even though Adobe is telling everyone they need to update. It is true that you will most likely need to update the plugins for CC 2015 so their advice isn’t bad. However, before paying for upgrades load the plugins and see how they behave. They might work fine. Of course, Beauty Box 4 is super fast in both Premiere and After Effects, so you might want to upgrade anyways. :-)

We do our best not to force users into upgrades, but since Adobe has rejiggered everything, only the current releases of our products will be rejiggered in turn.